Nuke’s Grade Node Demystified
The Grade node inside Nuke is one of the most important and frequently used tools day-to-day. It’s used for both creative grading purposes (adjusting contrast or brightness) and technical value adjustment (fitting depth pass values into the visible normalized range, alpha modification, keying etc.). I’m going to break down each aspect of the node, explain how it works and recreate it using an expression node.
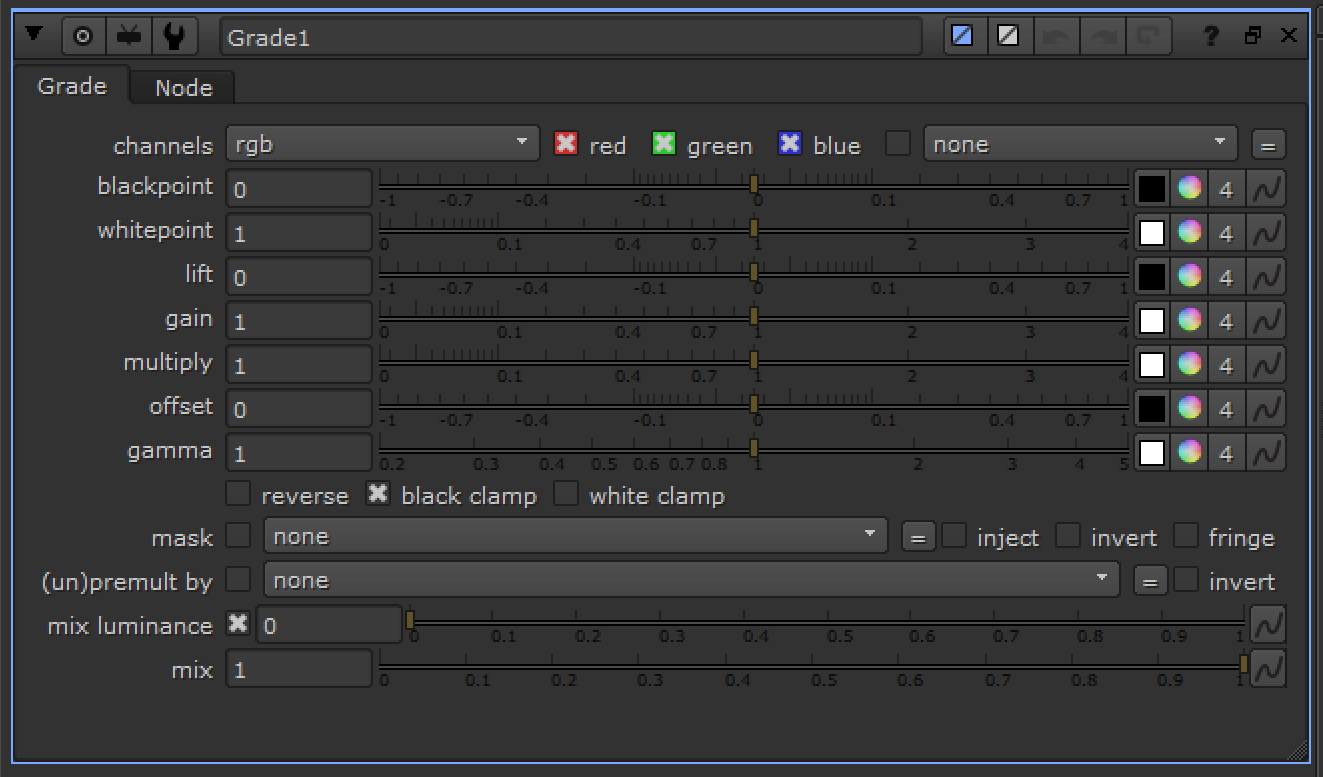
There are 7 parameters within the tool for adjusting an incoming image.
Copy and paste the following code into Nuke to demo for yourself. Set your project dimensions to a square / 1:1 aspect ratio.:
set cut_paste_input [stack 0]
version 12.0 v8
push $cut_paste_input
Expression {
 expr0 "clamp(((pow((((((((x/width)-blackpoint.r)/(whitepoint.r-blackpoint.r))*multiply.r*(gain.r-lift.r))+lift.r))+(offset.r+size)),(1/gamma.r))  /  (y/height)) - 0.999)/0.0001)  *  (1-clamp(((pow((((((((x/width)-blackpoint.r)/(whitepoint.r-blackpoint.r))*multiply.r*(gain.r-lift.r))+lift.r))+(offset.r-size)),(1/gamma.r))  /  (y/height)) - 0.999)/0.0001))"
 expr1 "clamp(((pow((((((((x/width)-blackpoint.g)/(whitepoint.g-blackpoint.g))*multiply.g*(gain.g-lift.g))+lift.g))+(offset.g+size)),(1/gamma.g))  /  (y/height)) - 0.999)/0.0001)  *  (1-clamp(((pow((((((((x/width)-blackpoint.g)/(whitepoint.g-blackpoint.g))*multiply.g*(gain.g-lift.g))+lift.g))+(offset.g-size)),(1/gamma.g))  /  (y/height)) - 0.999)/0.0001))"
 expr2 "clamp(((pow((((((((x/width)-blackpoint.b)/(whitepoint.b-blackpoint.b))*multiply.b*(gain.b-lift.b))+lift.b))+(offset.b+size)),(1/gamma.b))  /  (y/height)) - 0.999)/0.0001)  *  (1-clamp(((pow((((((((x/width)-blackpoint.b)/(whitepoint.b-blackpoint.b))*multiply.b*(gain.b-lift.b))+lift.b))+(offset.b-size)),(1/gamma.b))  /  (y/height)) - 0.999)/0.0001))"
 name plot_grade
 note_font "Bitstream Vera Sans"
 selected true
 xpos -405
 ypos -249
 addUserKnob {20 User}
 addUserKnob {7 size R 0 0.01}
 size 0.005
 addUserKnob {26 ""}
 addUserKnob {18 blackpoint}
 blackpoint {0 0 0}
 addUserKnob {6 blackpoint_panelDropped l "panel dropped state" -STARTLINE +HIDDEN}
 addUserKnob {18 whitepoint}
 whitepoint {1 1 1}
 addUserKnob {6 whitepoint_panelDropped l "panel dropped state" -STARTLINE +HIDDEN}
 addUserKnob {18 lift}
 lift {0 0 0}
 addUserKnob {6 lift_panelDropped l "panel dropped state" -STARTLINE +HIDDEN}
 addUserKnob {18 gain}
 gain {1 1 1}
 addUserKnob {6 gain_panelDropped l "panel dropped state" -STARTLINE +HIDDEN}
 addUserKnob {18 multiply}
 multiply {1 1 1}
 addUserKnob {6 multiply_panelDropped l "panel dropped state" -STARTLINE +HIDDEN}
 addUserKnob {18 offset}
 offset {0 0 0}
 addUserKnob {6 offset_panelDropped l "panel dropped state" -STARTLINE +HIDDEN}
 addUserKnob {18 gamma R 0 5}
 gamma {1 1 1}
 addUserKnob {6 gamma_panelDropped l "panel dropped state" -STARTLINE +HIDDEN}
}
Blackpoint/Whitepoint

This is used for remapping the incoming blacks/whites of an image to true black and white, 0 and 1. Typically you’d use the colour picker to select both the deepest black and the brightest white. Whichever value is entered into each parameter is what will become 0 or 1.
The function is (x-blackpoint)/(whitepoint-blackpoint).
This is the first half of a Fit Function. Read more about those on my blog.
Lift & Gain/Multiply

The lift pushes the toe of the image up, pivoting from 1 (which means that if you increase it, any bright values above 1 will actually be reduced). It is therefore also the direct opposite of multiplication, essentially inverted multiplication. You’ll notice that both the top and bottom ends are moving in the same manner.
These are the second half of the fit function of the grade node, as they are used for remapping/setting the new blacks and whites. Think of the blackpoint/whitepoint as source black and source white, and the lift/gain as the destination black and destination white.
The function looks like (x*(gain-lift))+lift.
The gain and the multiply are both simply multiplications, though the gain is linked to the lift. The multiply slider is unlinked to the lift however, with the function of (x*multiply*(gain-lift))+lift.
Creatively, it’s usually useful to use one for your luminance adjustment and the other for per-channel RGB adjustments.
Offset

As simple as it looks, the offset is just simple addition. Used for raising or lowering all values in the range by the same amount.
The function is literally just r+offset.
Gamma

One of the more complex adjustments, gamma is extremely useful for a whole host of purposes. I’ll limit the scope of gamma in this article to purely grading purposes (and will probably write a more in-depth one on Gamma alone in the future). As you can see from the demo above, it is unique in that it can break the linearity of the image, darkening or brightening it without touching the black and white values. None of the above can do this — notice that without gamma the curve always retains its linearity. Gamma however is more practical for contrast adjustments as blackpoint/whitepoint adjustment is very harsh on the top and bottom end. This allows for smoother results, similar to plotting custom points on a curve in Photoshop or with a Colour Lookup.
The function for gamma is pow(x,(1/gamma)).
Combined Functions
All the above functions can be combined into the following:
pow((((x-blackpoint)/(whitepoint-blackpoint)*((gain*multiply)-lift))+lift)+offset,(1/gamma))
Clamping
Remapping values using the Grade will very quickly plunge black values lower into the negative domain, as if you were to sample anything but the darkest pixel in the image then the darker value will be set less than 0. Nuke defaults to clamping the blacks after applying the image adjustments for this reason. You would need to untick this box if remapping noise or other maps used for displacement in the negative direction.
Demonstration


Assuming both gifs load in unison, the above demo shows the effects of using all the sliders together, with different per-channel values. I’ve plotted 0.7 as a base value on the curve so you can track it as the adjustments are made.
Read more about the maths behind these adjustments in my blog post on Fit Functions.